Getting Started: Your First Steps as a Stickman Archer
So you just picked up Ragdoll Archers and you are probably thinking, "How hard can it be? Point, shoot, done, right?" Trust me, I have been there. After a few embarrassing deaths where my stickman flopped around like a fish out of water, I realized this game has more depth than it lets on at first glance.
The core loop is pretty straightforward: shoot bad guys, grab the skull coins they drop, upgrade your abilities, and survive increasingly ridiculous waves of enemies. But here is the thing - the ragdoll physics make every shot feel like you are wrestling with chaos itself. Your character does not just stand there like a normal archer. Oh no. They wobble, they sway, they do little dances when you are trying to line up a perfect headshot. It is frustrating at first, but that is exactly what makes those clutch kills so satisfying.
Understanding the Two Most Important Bars
Before you start firing arrows like a caffeinated porcupine, you need to understand two things: your health bar (the red one) and your stamina bar (the blue one). These are your lifelines, and managing them properly is the difference between a solid 5-minute run and a legendary 20-minute survival streak.
Your stamina bar is probably the one you will neglect at first - I know I did. Big mistake. Every shot you take drains stamina, and here is the kicker: jumping also costs 5 stamina. So if you are jumping around like an excited kangaroo trying to dodge arrows, you will run dry fast. And when your stamina hits zero? You are stuck standing there like a sitting duck while enemies rain arrows on you. Not ideal.
That is where the flying apples come in. They are basically gift-wrapped survival chances floating around the arena. Red apples restore 30 health, green apples give you 30 stamina, and the holy grail - golden apples - restore both. I have lost count of how many times a golden apple saved my run when I was one hit away from death.
My Go-To Early Game Strategy
When you are starting out, resist the urge to spend skulls on flashy damage upgrades. Trust me, I made that mistake and got destroyed because I would run out of stamina after three shots. Here is what actually works:
- Prioritize stamina upgrades first - More stamina means more shots and more mobility. More shooting opportunities equal more kills equal more skulls. It is a beautiful cycle.
- Grab every apple you see - Especially during intense firefights. Those brief moments when you are between enemy waves? Scan the arena for floating apples before anything else.
- Start with basic arrows - Learn how the trajectory works. Once you are comfortable with aiming and leading your shots, then experiment with poison, electric, and other special arrows.
- Do not jump unnecessarily - Jump only when you absolutely need to dodge. A well-timed jump can save your life, but spam-jumping will leave you exhausted and vulnerable.
Mastering the Art of the Headshot
Here is a tip that completely changed my game: aim for the head. I know it sounds obvious, but in the heat of battle with your ragdoll character doing the jitterbug, hitting the head feels like hitting a moving target riding a carousel. But when you nail it? Instant kill, regardless of enemy type. Body shots work too, but they take multiple hits, which drains your stamina faster.
The trick is to predict where your opponent will be, not where they are. The physics in this game are... let us say "enthusiastic." There is travel time on arrows, and if you are aiming at a moving target, you need to lead them. For headshots specifically, aim slightly above where you think their head will be when the arrow lands.
The Three Game Modes: Which One Is For You?
Solo Survival Mode
This is where you cut your teeth. Waves of enemies get progressively harder, and you will encounter different enemy types - some with armor that takes extra hits, and giant enemies that function as mini-bosses. The giants are tough but drop a ton of skulls, so they are worth prioritizing when they appear. Solo mode is excellent for practicing your aim and learning enemy patterns without the pressure of another human trying to make you look foolish.
PvP Battles
Playing against a friend (or enemy, depending on how the match goes) is where things get spicy. It is best-of-five rounds, and the tension is real. In PvP, positioning matters a lot. High ground gives you better sightlines and makes you a harder target. Predicting your opponent movement becomes crucial because they are doing the exact same thing to you. I found that players who stay mobile and pick their shots carefully tend to dominate.
Co-op Mode
My personal favorite. Teaming up with a friend against waves of enemies creates this awesome coordination dynamic. You can cover each other, focus fire on tough enemies, and revive the situation when one of you takes a beating. The key in co-op is communication - call out when you are low on health or when a giant enemy spawns.
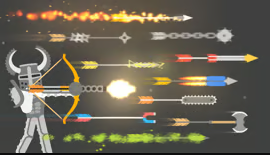
Arrow Types and When to Use Them
Once you have accumulated some skulls, you will unlock different arrow types. Each one fundamentally changes how you approach combat:
- Poison Arrows - Perfect for softening up tough enemies. The damage-over-time effect can finish off low-health targets while you are reloading or repositioning.
- Electric Arrows - Crowd control machines. When enemies are clustered together, one electric arrow can stun multiple targets, setting up easy follow-up shots.
- Balloon Arrows - Hilarious and practical. They lift enemies into the air, making them sitting ducks for your next shot, or they can lift them right off the platform for an instant environmental kill.
- Axe Arrows - Heavy hitters with massive knockback. Great for punting enemies into spikes or off the map entirely.
- 3-Shot Bow - My recommendation for early progression. Firing three arrows in quick succession gives you excellent crowd control and makes hitting something - anything - much more likely.
The Upgrade Path That Actually Works
After spending way too many skulls on the wrong things, here is the progression I wish someone had told me about:
- Stamina capacity (first priority - more shots, more mobility)
- Stamina recovery rate (keeps you in the fight longer)
- Health upgrades (gives you breathing room for mistakes)
- Damage upgrades (faster kills conserve resources)
- Pull speed (faster aiming means quicker reactions)
Final Thoughts
Ragdoll Archers is one of those games that seems simple on the surface but reveals its depth the more you play. The ragdoll physics that initially made me want to throw my mouse out the window are actually what makes this game special. Every match has those "did that just happen?" moments where enemies go flying in ridiculous directions or you nail a triple kill with a perfectly timed electric arrow.
The key is patience - do not rush your shots, respect the stamina system, and always, ALWAYS grab those golden apples when you see them. Master these basics, and you will be climbing the survival time rankings in no time.